
When seeking a more secure connection method to access Fusion Apps Endpoints (e.g., REST API or Integration Cloud Adapter) beyond basic authentication, OAuth 2.0 is the preferred choice. To implement OAuth 2.0 with Fusion Apps to connect Integration Cloud, you must configure two confidential applications in OCI IAM (formerly known as IDCS – Identity Cloud Service). This article provides a step-by-step guide on setting up these applications for a Fusion Apps Endpoint.
In this introductory blog post, we’ll address how to seamlessly connect Oracle Integration Cloud to Fusion Apps, like ERP Cloud, using OAuth 2.0. Our journey begins with establishing a confidential application in OCI IAM. This crucial step aids in accessing the Fusion Apps Endpoint URL.
It’s noteworthy that Oracle has recently integrated the functionalities of Oracle Identity Cloud Service (IDCS) directly into Oracle Cloud Infrastructure Identity and Access Management (OCI IAM). This move means the methodology for setting up this application has slightly changed from what’s commonly detailed in many existing blogs and Oracle Support Documentation notes.
What you need to know about OCI IAM
In the updated Oracle Cloud Console, all instances previously associated with Oracle Identity Cloud Service (IDCS) are now represented as identity domains. For OCI tenancies with an earlier auto-federated IDCS instance, you’ll spot this as an identity domain within the OCI tenancy root compartment, labeled as “OracleIdentityCloudService“. However, for newer tenancies (post-merge), it’s listed as the “default” domain.
There are subtle stylistic shifts that customers might observe on the IDCS sign-in page, particularly for those who utilized IDCS for user authentication in apps. Notably, an added “identity domain” attribute mirrors the IDCS instance name. The most significant transition, however, is the rerouting of the Identity Cloud Service administration console to the Oracle Cloud Console. Rest assured, the same array of admin functionalities is preserved in this new interface.
Before

After

Creating a confidential application in OCI IAM
To locate Identity domains within the Oracle Cloud Console, follow these steps:
- Go to the navigation menu and click on Identity & Security.
- Under the Identity section, choose Domains.
If your setup previously involved IDCS, proceed to establish an application under the “OracleIdentityCloudService” domain. However, if you’re newer to the system, initiate your application within the “Default” domain.
Identity & Security > Domains

Select Domain to create Application under

For the purpose of this guide, we’ll be selecting the “Default” domain. While you have the option to create new domains according to your preferences, we’ll stick to the basics for clarity and simplicity in this walkthrough.
Upon selecting the domain, you’ll land on the domain overview page. Here, there are two essential elements to take note of:
- The “Integrated Applications” link.
- The domain URL.
Interestingly, even after the updates, you’ll observe that the domain URL retains a reference to IDCS.

To set up a new confidential application, first click on the “Integrated applications” option in the menu. This page displays a list of all the applications you’ve previously created. It provides you with options to activate, deactivate, or delete any of these applications. For our current purposes, we’ll be moving forward with the creation of a new application in the subsequent steps.
Add two new applications
We will be adding two confidential applications in total. The first is intended to expose the Fusion Apps URL, while the second will grant OAuth 2.0 access to external clients, such as Integration Cloud.

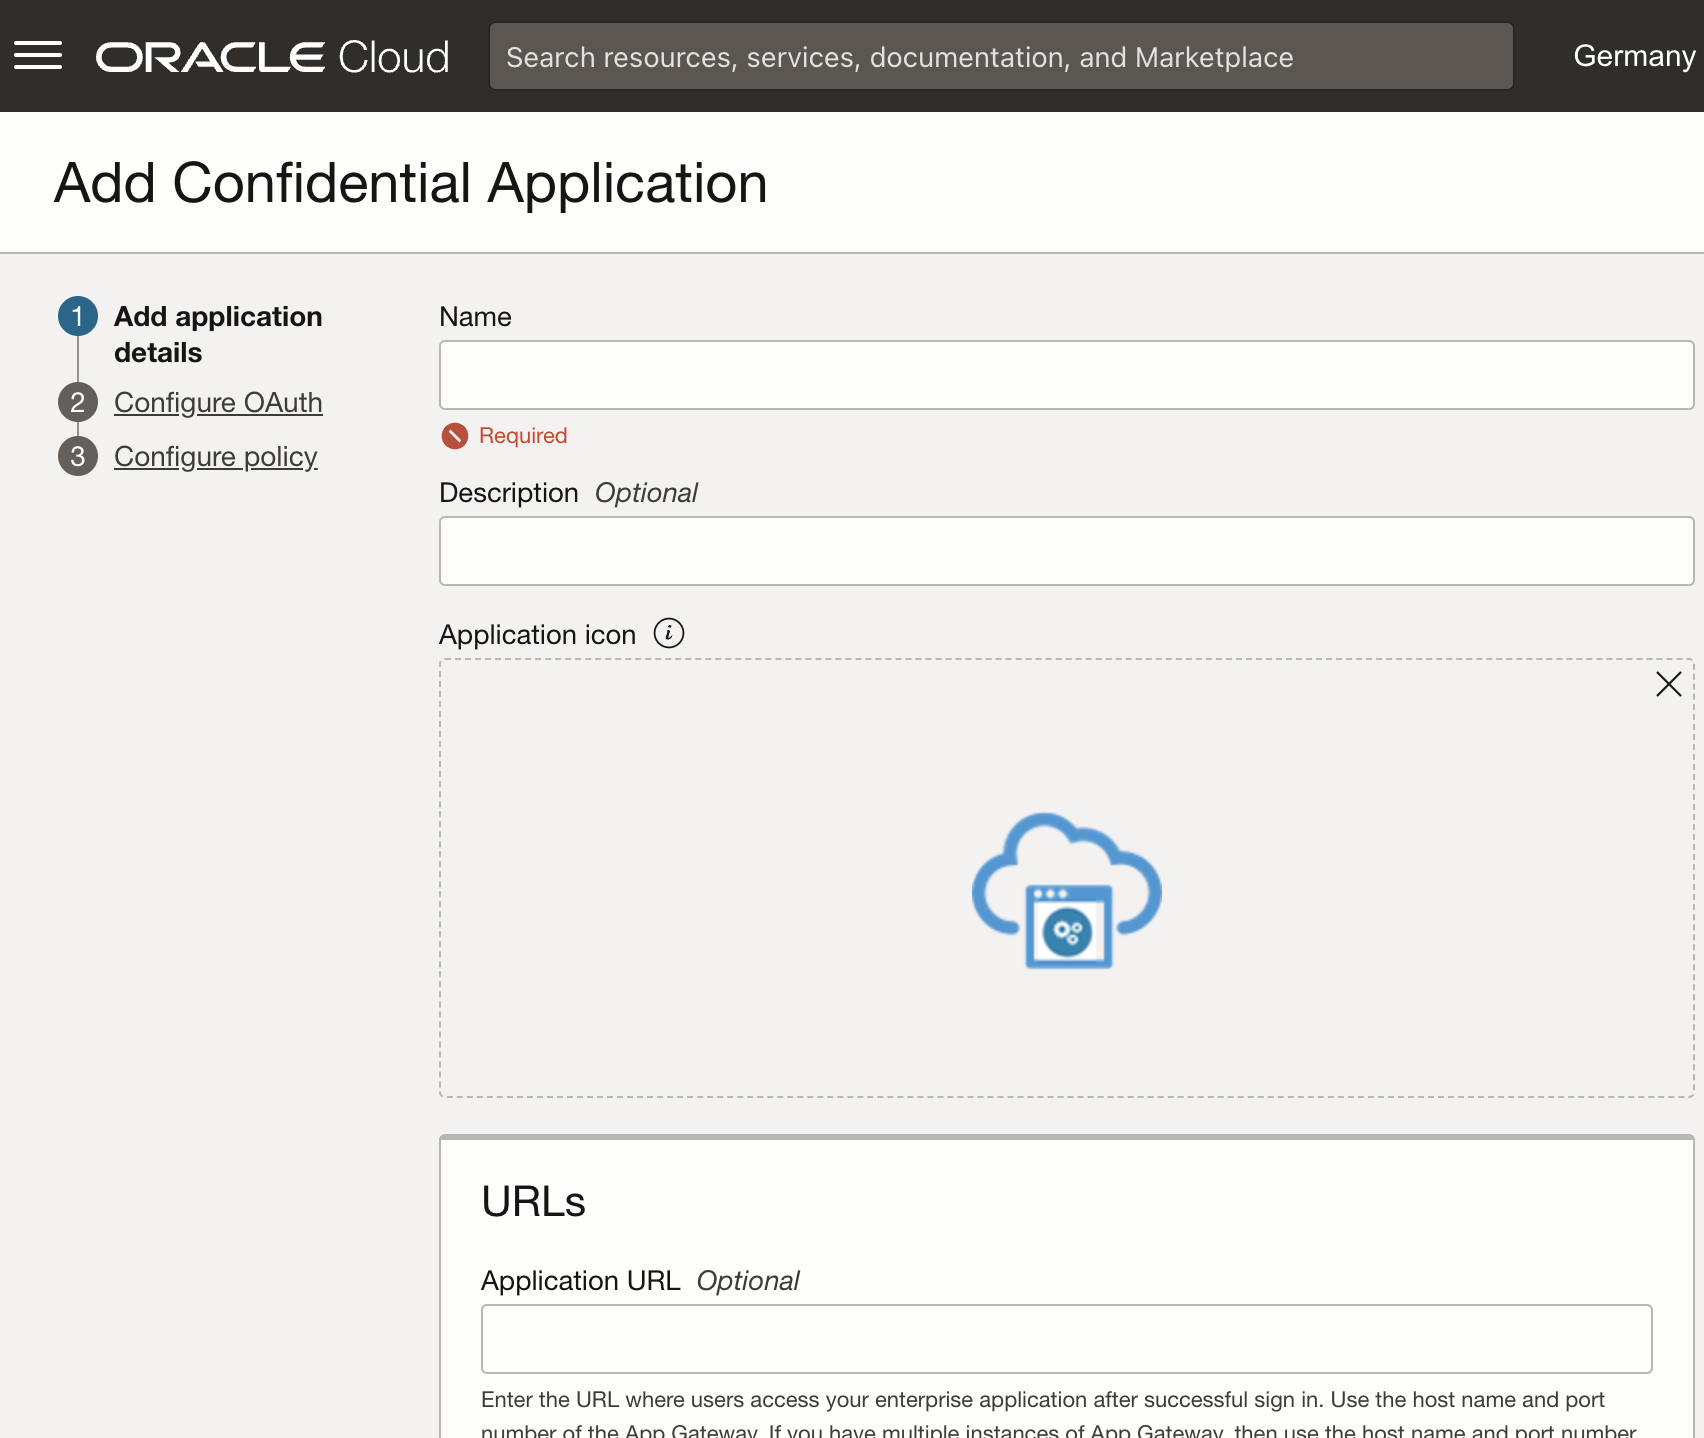
To begin adding a new application, click on the “Add application” button. This action will prompt a popup modal presenting various application types you can choose from, such as SAML, Mobile Application, and Confidential Application. For our specific requirements, we’ll opt for the Confidential Application.
By initiating this workflow, we’re setting up a web-server or server-side application. This application will utilize OAuth 2.0, allowing multiple users to access it. Moreover, it will be hosted on a secure server, ensuring that users can safeguard their access via their OAuth client ID and client secret.

During the initial step, all you need to do is provide a name for your application. If you plan on solely utilizing the client ID and client secret in API calls, or if you’re content with the default Oracle sign-in screens, you can bypass the subsequent queries. All the following fields are optional, so you’re not obligated to fill them out unless specific customization is needed.


Name the initial application as “FusionOAuthApp” and then click on the “Next” button. Moving on to the second step, you’ll be prompted to outline the application’s configuration. Here, you’re presented with choices: either bypass the configuration entirely or set it up as a resource server and/or client server. As previously discussed, our objective requires us to set up two distinct applications. For this primary application, we’ll configure it specifically as a resource server.
Configure resource server
Next, we’ll delve into a three-step process to configure the Fusion App endpoint. Each step offers a detailed guide, and for a clearer view of the end result, simply click on the following images. These will give you a visual representation of what the described configuration should look like.
Configure resource server

Configure Primairy Audience

Add “all” scope

Configure application API
Let’s proceed with configuring the Fusion App endpoint:
- Token Settings: On the configuration page, retain the default access token expiration time at 3600 seconds, which equates to one hour. However, make sure to enable the “Allow token refresh” option.
- Primary Audience Configuration: The crucial field here is “Primary Audience.” This should be set to the URL of the Fusion App. For instance:
https://ucf3-zwfp-fa-ext.oracledemos.com:443. - Scope Configuration:
- Begin by checking the “Add scope” box.
- Next, click on the “Add” button, which will slide out a side-panel for further configurations.
- Within this side-panel, define a scope using the value “/” (just a single slash).
- Provide a pertinent description for this scope, e.g., All.
- Ensure the “Require user consent” option is toggled on.
- Finalizing Configuration: After setting the above configurations, click “Next”. On the subsequent “Configure Policy” page, ensure the “Skip and do later” option remains selected. Then, conclude the setup process by clicking “Finish.”
You’ve now successfully configured the Fusion App endpoint.
Verify and activate confidential application
After finalizing the configuration, you’ll be automatically redirected to the application summary page. This page provides an overview of the settings you’ve just established. Once you’ve reviewed and ensured that everything is in order, proceed to activate the application. Simply click on the “Activate” button to finalize the process and make the application operational.


Add and Configure client server confidential application
Name the second application as “FusionClientApp” and then click on the “Next” button. Moving on to the second step, you’ll be prompted to outline the application’s configuration. This time we’ll configure it specifically as a client server, which follows a more lengthier configuration. Each step offers a detailed guide, and for a clearer view of the end result, simply click on the following images. These will give you a visual representation of what the described configuration should look like.
Configure client server

Add specific resource

Add scope of first created app

Configure client server
Moving forward, let’s outline the steps to set up the Integration Cloud OAuth Client:
- Authorization Types: Within the configuration page, toggle on both “Refresh token” and “Authorization code” options. If you’re considering utilizing the application for custom API interactions, you can also enable the “Client credentials” option.
- Redirect URL: Since we’ve activated the “Authorization code” flow, specifying a redirect URL becomes mandatory. If you’re operating with Integration Cloud, the callback URL of your OIC instance is required. This can be procured from OCI on the summary page. Simply obtain the service console URL and append “icsapis/agent/oauth/callback” to it.
- IP Address Settings: Navigate down the configuration page to the Client IP address section. Based on your security needs, opt for either “Anywhere” or “Network perimeter.” For the purpose of this guide, we’ll choose “Anywhere” (not making a selection yields the same outcome).
- Token Issuance Policy: From the available options, pick “Specific” Subsequently, an “Add resources” option will be visible; make sure to enable it.
- Scope Configuration:
- Hit the “Add scope” button, ushering in a side-panel for additional configurations.
- In this new panel, locate the scope we set up earlier by searching “Fusion“
- Mark the FusionOAuthApp entry (or the named you used earlier) and go into its details.
- Confirm that the “audience url of fusion apps” scope is checked.
- Final Steps: Post-configurations, click the “Next” button. In the ensuing “Configure Policy” section, maintain the selection of “Skip and do later.” Round off the procedure by pressing “Finish.”
You’ve now successfully configured the OAuth Client App for Integration Cloud.
Verify and activate confidential application
After finalizing the configuration, you’ll be automatically redirected to the application summary page. This page provides an overview of the settings you’ve just established. Once you’ve reviewed and ensured that everything is in order, proceed to activate the application. Simply click on the “Activate” button to finalize the process and make the application operational.
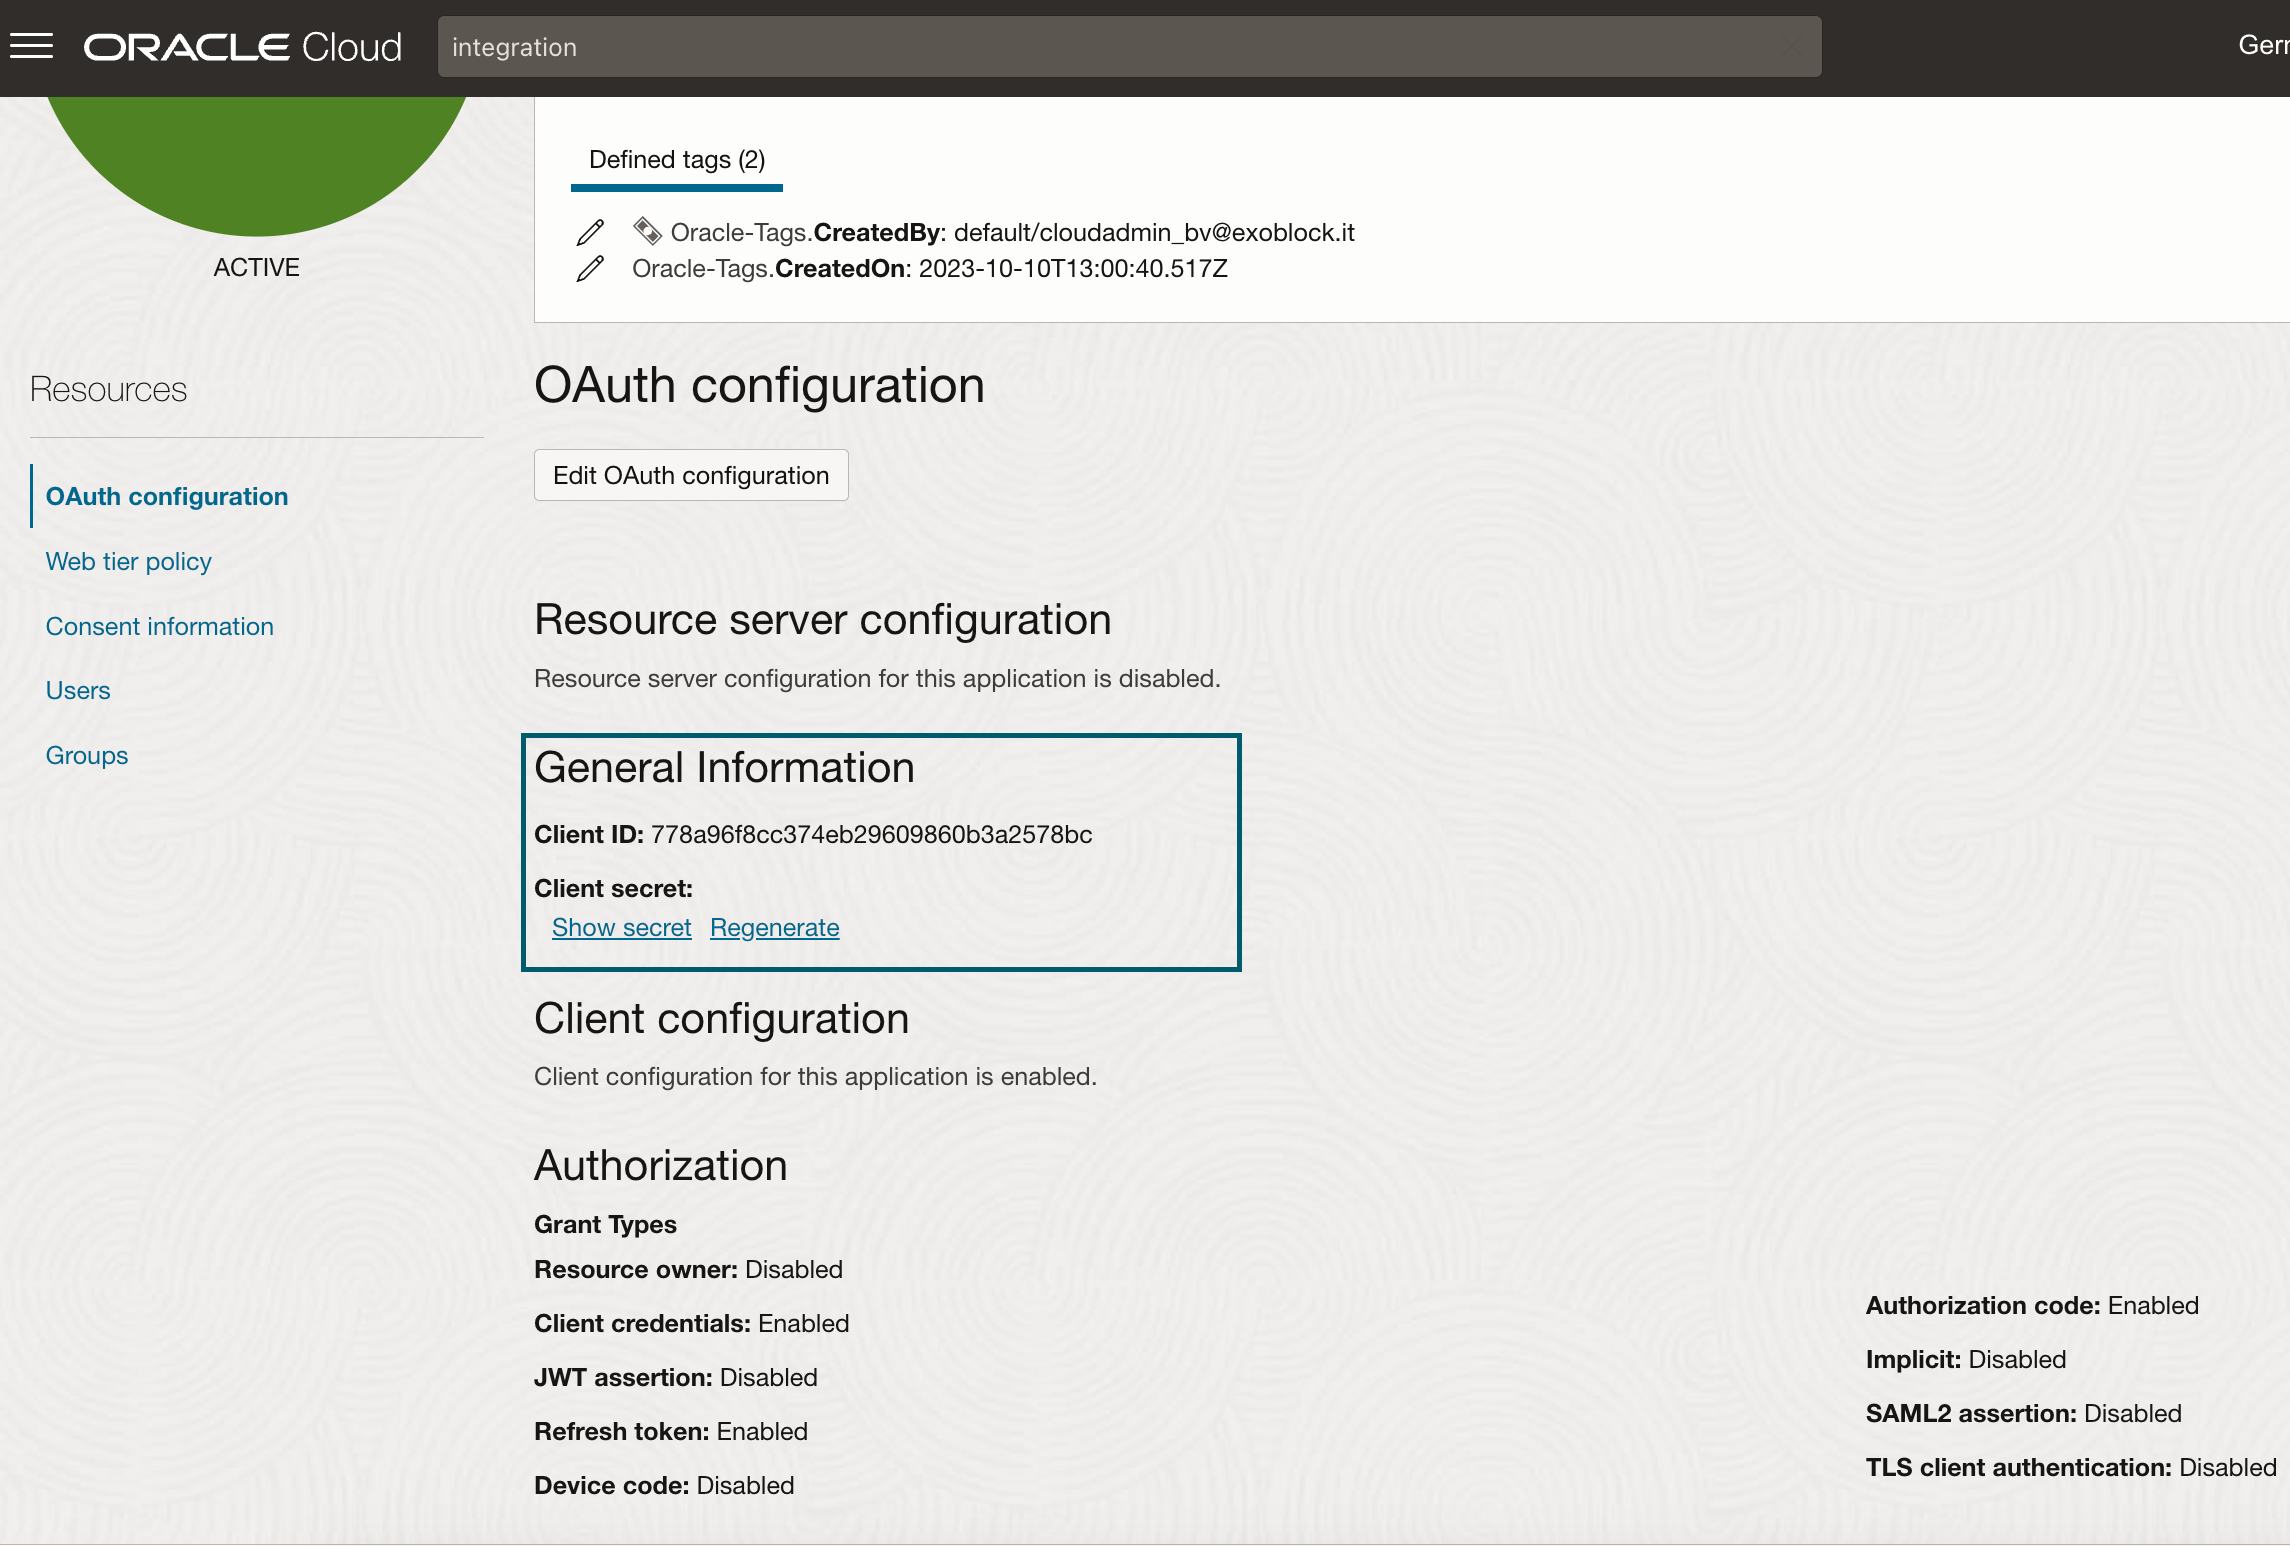
On the summary page, you’ll observe the display of the Client ID and Client Secret details. These are crucial pieces of information you’ll require for future OAuth interactions. To get a clearer visual understanding of where these details are located and how they appear, refer to the accompanying images. If you’re sharing or referencing this setup with others, always exercise caution with these images to avoid revealing sensitive credentials.


Conclusion
In this article, we’ve walked through the process of creating two confidential applications, enabling access to the Fusion Apps Endpoint specifically for Oracle Integration Cloud. In our forthcoming article, we’ll delve deeper, focusing on establishing a connection between Oracle Integration Cloud and Fusion Apps by facilitating OAuth consent.
For those eager to get a head start on the next steps, here’s a handy tip: Remember to set up a local OCI IAM user that mirrors a user in Fusion Apps. For instance, if Fusion Apps has a user identified as SA_FA_DEV, ensure there’s a corresponding user with the same username in OCI IAM. Stay tuned for more detailed insights in our next installment!
Leave a Reply